Installing Your Water Prepared Tanks
So easy, there's almost nothing to it.
How to Prepare and Install Your Water Container
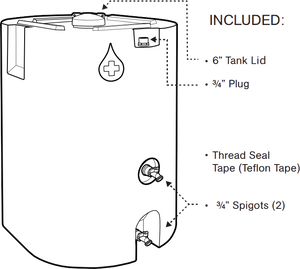
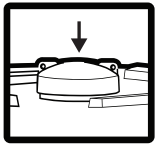
Step 1:
Unscrew cap and remove parts bag from under the cap. Uncover tank.
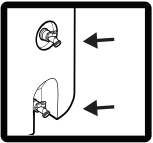
Step 2:
Check middle and lower black bulkhead fittings.
Check to make sure black fittings have been securely tightened. Turn nut counter-clockwise, hand tight, until fastened firmly against tank.
DO NOT OVER-TIGHTEN FITTINGS.
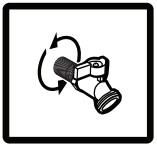
Step 3:
Lightly tape spigots and 3/4” plug by wrapping Teflon tape counter-clockwise 2-4 times around threads as shown. Do not wrap more than 4 times. OVER-TAPED SPIGOTS CAN DAMAGE THE BLACK BULKHEAD FITTINGS.
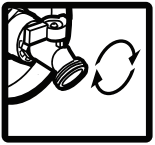
Step 4:
Slowly twist spigots into fittings. Avoid cross-threading or stripping. Only hand tighten spigots, some threads may remain visible. DO NOT OVER TIGHTEN spigots. Over tightening spigots can cause damage the black bulkhead fittings. Spigots may not be exactly vertical, but do not over-tighten to straighten spigots.
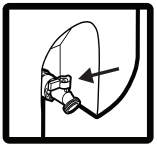
Step 5:
Insure both spigots are fully closed, with handles turned perpendicular to the spigot. Fill tank through 6″ opening at top of tank using a potable/drinking-water-safe hose (Lead-Free).
Fill tank half way just above the middle fitting) and verify there are no leaks before filling completely.
Home Water Storage Container Rotation
How Often: FEMA recommends rotating your home water storage every six months if not using “commercially bottled water.” We, however, recommend at least every 12 months. If treated, your water storage can last longer.
Easiest Way: The easiest way to empty your water container is by hooking a potable water hose directly to the spigot on the bottom of your water container. If your water container is located indoors, the bottom spigot allows you to drain your water directly into a floor drain. When stacking your water containers ALWAYS empty the top container before the bottom container.
What to Do With The Old Stored Water: If you don’t want to waste good water, there are many uses for the old water in your water storage containers; you can water your plants, wash your car, or have a water balloon fight. Any way you do it, it’s better not to waste good water (though in some cases, it can’t be helped). You can also use the water to flush toilets or wash a few loads of laundry… just use your imagination and be creative!
How to Treat and Protect Your Long Term Water Storage
Chlorine Drops: Chlorine drops are the most common way to treat your water, but dissipates over about 12 months. Other copper or silver based treatments claim to last five or more years for longer storage.
Avoid Sunlight: Keeping your water out of the sunlight is one of the single most important ways to protect your water storage. WaterPrepared water storage containers do this for you; each water container is made with a special UV protectant similar to sunscreen. By reducing exposure to UV rays, the risk of bacteria growing in your water is minimized. However, it is still best to keep your water container in a cool, dark place.
Check for Leaks: It is recommended to visually check your water containers on a regular basis to verify there aren’t any leaks.
Leak Troubleshooting
Leaks are rare. Each tank is pressure tested and light tested before being shipped. However, if you do experience a leak, please pay close attention to the source of the leak. Once you are certain you know where the water is leaking from, immediately drain the tank and then follow the steps below.
- LEAKING FROM FRONT OF SPIGOT: Ensure spigot is fully closed. If leak continues, fully open the spigot and re-close spigot tightly.
- LEAKING BETWEEN SPIGOT AND BLACK BULKHEAD FITTING:Try tightening spigot. If leak continues, drain tank, remove spigot, and re-install spigot carefully following assembly instructions steps 3 and 4.
- LEAKING BETWEEN BULKHEAD FITTING AND TANK: If possible hand-tighten fitting.
- LEAKING FROM TANK RESIN: Visually inspect tank for signs of damage. Contact Manufacturer at (888) 252-6522.
STACKING INSTRUCTIONS
DO NOT STACK MORE THAN 2 TANKS. Fill bottom tank first and tighten cap. It is not recommended that you connect or plumb tanks together.
